Lab 02 - GitHub
JSC370 (Winter 2026)
Learning goals
In this lab, you are expected to learn/put in practice the following skills:
- Creating your own repo for JSC370
- Branching on GitHub
- Git workflow clone/commit/push
- Using pull requests (PR)
Download lab .qmd here
Part 1: Create JSC370 personal repo
Create a repo named JSC370 on GitHub, include
README.mdand.gitignoreClone the repo to your local machine:
git clone <your-repo-url>
cd JSC370- Create a directory for your labs and add this lab file:
mkdir labs
cp /path/to/lab02-github.qmd labs/
Manually edit
.gitignoreto have GitHub ignore MS Word.docxfiles (add*.docxto the file)Stage, commit, and push all changes:
git add .
git commit -m "Add labs directory with lab02"
git push
Add link to your repo below in the cell chunk:
Part 2: Updating a single shared repo
One of the most common tasks that people uses git for is for collaborating. While in general team members organize such that there are no overlapping editing of the files, git is smart enough to avoid clashes when multiple edits are done in the same document1. To show this, we will do a collaborative edit of a file!
We will be working with the repository https://github.com/JSC370/JSC370-lab2-2026-whoami
Step 1: Clone the repo and create a branch
Branching is a core feature of Git that allows you to create an independent line of development. When you create a branch, you’re making a copy of the code at that point in time where you can make changes without affecting the main branch. This is how teams collaborate: each person works on their own branch, then proposes their changes via a pull request (i.e. “I have this great update to the project! Would you like to add it by pulling my branch into main?”).
First, clone the repository to your local machine using the git clone command:
cd <your-directory>
git clone <repository-url>
Once you have the repository on your local machine, create a new branch for your changes. Use your name or a descriptive name for the branch2:
cd <repository-name>
git switch -c <your-name>
The -c flag creates a new branch and switches to it. You can verify you’re on your new branch by running:
git branchThis will show all branches with an asterisk (*) next to your current branch.
When you’re ready to push your local branch to the remote repository for the first time, use:
git push --set-upstream origin your-nameThis sets up tracking between your local branch and the remote, so future pushes can simply use git push. Now you’re ready to make changes without affecting the main branch!
Step 2: Modifying the corresponding line
If you got the correct copy, you should find a very simple repository with only two files: .gitignore and README.md. The first file is just a reference file for git to know what things it should be “looking at” (checkout the lecture slides), so we will ignore it at this time (pun intended). The second file is the one that we will be playing with. The README file, which happens to be a Markdown file, contains, or at least will contain, your and your team members biographies. Here is what you need to do:
Find the line with your name.
In that single line (i.e. not spanning multiple lines), write something about yourself, e.g. “I am from XYZ, I love doing ABC, …”.
(optional) if you feel like it, add at the end of the line a picture of yourself (or avatar) using either html or markdown. This will require you to include the figure in the repo (if you are not linking a web fig).
Commit the changes and push the changes to your branch using
git commitandgit push, e.g.
git add .
git commit -m "[A short but meaningful message]"
git push
You are now one step closer to make your first “pull request”. We will see how that happens in the next part.
Step 3: Do the pull request
This is the final step. Overall, pull requests (PR) are as complex as the proposed changes are. The PR that you are about to make should go smoothly, yet, any time that you make a new PR, the changes should be able to be merged in the original repository without conflicts. Conflicts may only appear if the proposed changes are out-dated with respect to the main repository, meaning that the main repository was modified after you created your branch and your proposed changes cannot be merged without generating conflicts3. For now, let’s just look at the simple case.
To create the PR, you just need to go to the repository on GitHub and click on the “Compare & pull request” button for your branch:
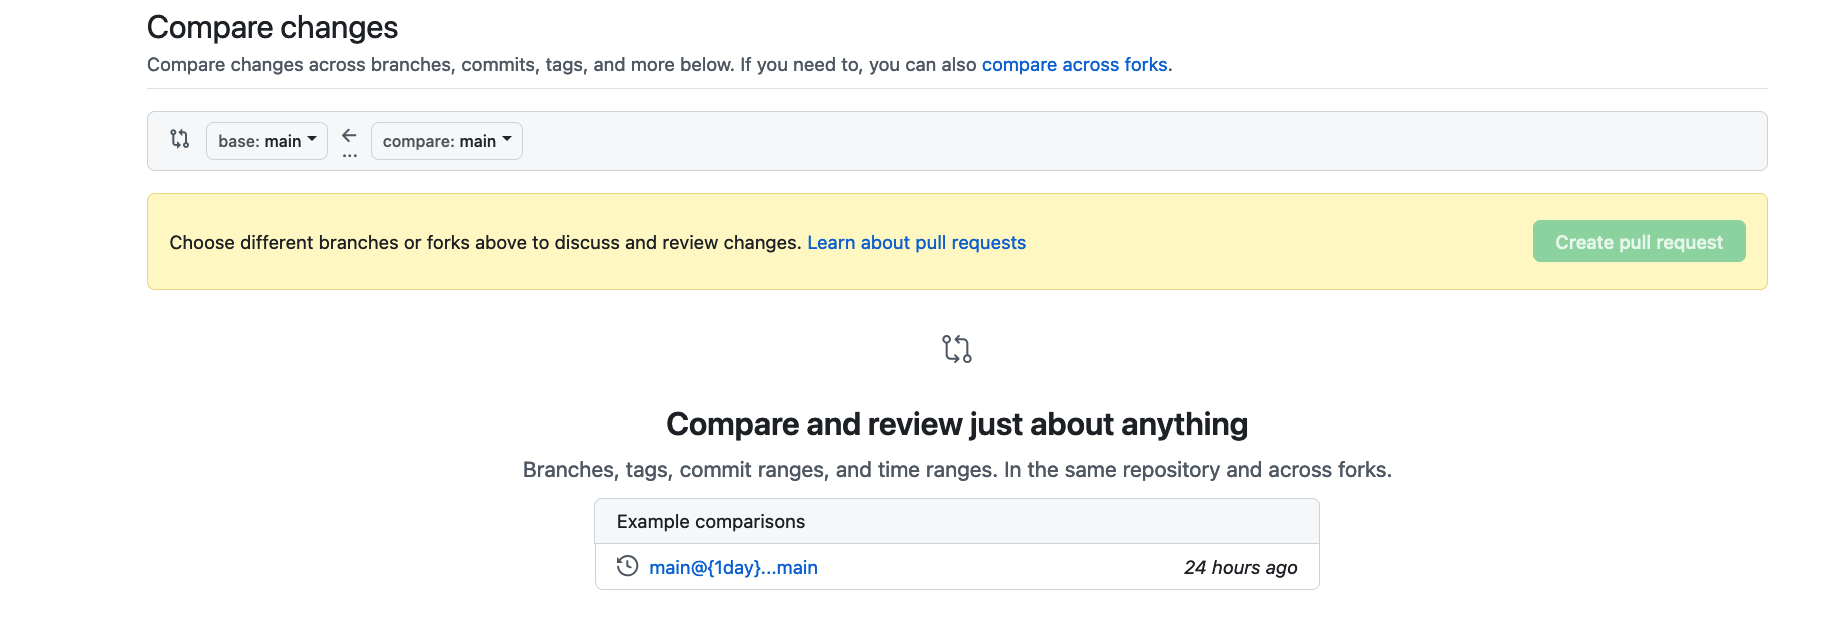
This will create a PR in the reference repository. GitHub will automatically analyze the PR and check whether merging the PR to the main branch will result in a conflict or not. If all is OK, then the owner/admin of the repository can merge the PR. Otherwise, if there’s a conflict, you can go back to your local repo, make the needed changes, commit the changes, and push the changes to your branch. In this stage, the PR will automatically update to reflect the new changes you made.
For more information checkout Creating a pull request on GitHub.
- Submit a pull request to https://github.com/JSC370/JSC370-lab2-2026-whoami
- Add details of the pull request below (the commit id of your change (you can find this using
git log)
commit:
Author:
Date:
Deliverables
- On MarkUs: submit this completed lab
.qmd
Footnotes
Team-members could be working on the same file but editing different lines of code. If this is the case, after pull/push, git will integrate the changes without conflicts.↩︎
For more on branch naming conventions, see Naming conventions for Git Branches.↩︎
More info about how to deal with conflicts in this very neat post on stackoverflow.com How to resolve merge conflicts in Git. GitHub also has a way to solve conflicts in PRs, but this is only available to the admins of target repo. More info here.↩︎